Tilt sensor accuracy
Tilt sensor is used to measure the object relative to the horizontal tilt angle, in the platform leveling, mechanical manufacturing, safety protection, precision measurement and many other fields have a wide range of applications, manufacturers are also many, but the market face of the accuracy of the inclination sensor understanding is unclear or even biased.
First define the accuracy of the tilt sensor: accuracy refers to the error between the angle measured by the sensor and the true angle. This error is usually defined as the mean square error. That is, the root mean square value between the results of multiple measurements and the true value.
Indicators that affect accuracy
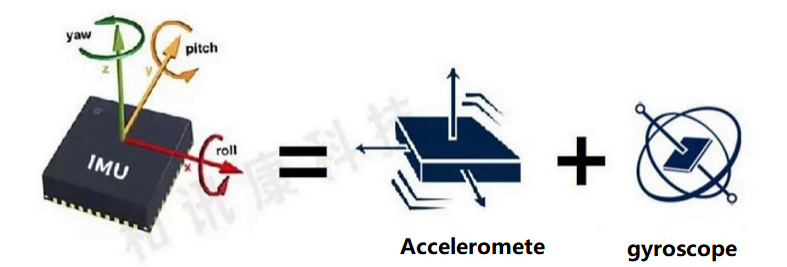
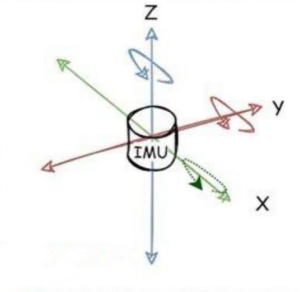
We take the tilt sensor of the acceleration sensing principle as an example. The acceleration sensor converts the component of gravity acceleration measured on the sensitive axis of the acceleration sensor into angle data, that is, the inclination value and the acceleration value are sinusoidal.
Where g represents the gravitational acceleration, a represents the inclination value measured by the acceleration sensor, and α is the inclination angle.
The measurement accuracy of the tilt sensor is closely related to the following indicators:
Noise – depends on the core sensitive device’s own characteristics, but at the same time associated with the frequency response, also known as amplitude frequency characteristics. Generally speaking, the higher the frequency response, the greater the noise. Noise determines the resolution of the sensor, and if the angle change is so small that the change is almost submerged in the noise and cannot be resolved, we consider the angle change to be the resolution of the tilt sensor. For example, the ER-TS-12200-Modbus, its resolution is 0.0005°, because its frequency response is not high, the angle change is very small, and the noise is very small.
The zero bias stability depends on the characteristics of the core sensitive device, which means that when the sensor has no angle input (such as absolute horizontal plane), the measured output of the sensor is not zero, and the actual output angle value is zero bias. The effect of zero bias on the accuracy of the sensor is not terrible, because the zero bias can be eliminated by calibration, but the zero bias usually drifts with time and temperature changes, the drift is called the zero bias stability, and this drift is usually difficult to eliminate, so the drift will cause the accuracy to deteriorate.
Nonlinearity – can be corrected later, depending on the number of correction points. The more correction points, the better the nonlinearity. Although the nonlinear can be corrected by the subsequent correction method, the nonlinear also has the phenomenon of drift, and the drift can not be eliminated, resulting in the deterioration of accuracy.
Cross-coupling error – refers to the error caused by coupling to the output signal of the sensor when the sensor applies a certain acceleration perpendicular to its sensitive axis or tilts at a certain angle. For example, for the wireless tilt sensor ER-TS-22800 with a measuring range of ±30° (assuming that the X direction is the inclination direction), when the space is tilted 10° perpendicular to the X direction (at this time, the actual tilt angle of the measured X direction remains unchanged, such as +5°), the output signal of the sensor will cause additional errors due to this 10° tilt. This error is called cross-coupling error. This extra error varies depending on the product. When the cross-coupling error of the inclination sensor is 3%FS(FS: full scale, full range), the additional error generated is 3%x10°=0.3°, and the actual output angle of the sensor is simply estimated to be 5.3°(=5°+0.3°). At this time, even if the nonlinear error of the inclination sensor reaches 0.01°, compared with the cross-coupling error, this nonlinear error can be ignored, that is, as the measurement accuracy of the inclination sensor, the cross-coupling error cannot be counted, otherwise it will cause a large measurement error.
Installation error – When the sensor is installed and measured, the measuring shaft should be reconnected with the sensor’s sensitive shaft. However, in the actual installation and measurement, it is always impossible to accurately match. For example, if the angle between the installation measuring shaft and the sensor’s sensitive shaft is 1 degree, the measured value is the projection of the actual angle change on the sensitive shaft. If the angle change is 30 degrees, the measured value is 30*cos(0.1)=29.995 degrees, the error is 0.005 degrees, so for high-precision applications, it is very important to keep the measurement shaft and the sensor sensitive shaft match.
Repeated measurement accuracy – depends on the core sensitive device’s own characteristics and cannot be improved by subsequent corrective measures.
The effect of temperature on zero point and sensitivity – also includes drift and repeatability of the temperature curve, which depends on the own characteristics of the core sensitive device and cannot be improved by subsequent correction measures. In the case of repeatability, it can be corrected later, depending on the number of correction points (angle points and temperature points). The more correction points, the better the temperature drift accuracy.
Range – Because the relationship between inclination measurement and acceleration is sinusoidal, the angle measurement error and acceleration measurement error meet the following relationship:
Where da is the inclination measurement error and da is the acceleration measurement error. When the range is close to 90 degrees, the acceleration a is close to the gravitational acceleration g, which is close to infinity, so a slight acceleration error causes a large inclination measurement error.
It can be seen that the systematic error of the inclination sensor contains the repeatability of noise zero deviation and temperature drift, which cannot be corrected and compensated, while the random error contains the cross-coupling error of the input axis non-aligned nonlinear temperature linearity which can be corrected
Positive-sum compensation measures to improve. Therefore, the measurement accuracy of the inclination sensor must not be measured only by nonlinearity, and it is necessary to synthesize the systematic error and random error of the sensor.
Therefore, the accuracy error of the inclination sensor should include nonlinearity, repeatability, noise, zero bias drift, zero nonlinear drift and cross-coupling error.


.jpg)
